From the June 2022 issue of 48° North.
For the past 10 years, I have been a shipwright. My boat repair and building career began with bottom painting at CSR, a boatyard on the Lake Washington Ship Canal in Seattle. Eventually, I started an independent shipwright business, in which I traveled to my client’s boats throughout Puget Sound. For a time, it was a floating shipwright business when my wife and I lived aboard our 39-foot sloop, Louise. We sailed to my client’s boats and stayed in the same marina or anchored out while I worked on their boats. In my work, I’ve done all sorts of projects: from window repair (lots of leaky windows) to digging out rotten decks, from marine systems installation to full hybrid electric conversions. My professional experience with fiberglassing is what brings us to this story, but first some background.
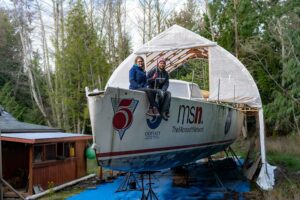
My wife and I reside in a house in Port Townsend now. We moved here a year ago because we love the area and there is plenty of work for a self-employed shipwright like me. Port Townsend is also an ideal town to embark on the most ambitious boat project of my life — The Duracell Project.
I am converting the legendary 60-foot race boat, Duracell, into a fast and comfortable family cruiser. Duracell was built and raced by American solo-sailor Mike Plant. In 1989 during the first Vendee Globe Race, Plant beat the American record for fastest solo circumnavigation (for more about Duracell’s storied past, see the January 2022 issue of 48° North).
It will likely take three years to bring Duracell back to life. There are so many projects that need to happen: we need a mast, we need to build an interior, install all the systems, and pretty much everything else. When we got Duracell a year ago, it was essentially a naked hull — a blank slate to envision and build into our dream cruiser.
Our first major modifications have been to the exterior. I built a new 15-foot long pilothouse that stretches over the future galley. I’m currently in the middle of the stern reconfiguration project which involves taking advantage of Duracell’s reverse (sloped) transom to extend the cockpit farther aft. Duracell’s hull is fiberglass and kevlar with vinylester resin and an airex foam core. Accordingly, these modifications have all involved extensive fiberglassing.
I have a complicated relationship with fiberglass work. It’s amazing what you can build using composites. You can make really strong and complicated parts that are also light — and keeping things light and strong are priorities for all of my Duracell endeavors. I first learned about fiberglassing early in my career. A year after I started at CSR, my boss gave me permission to build my own sailboat — an 18-foot i550 — in the loft of the main warehouse, after hours. I built Honey out of plywood and carbon, using stitch and glue construction. Since then, I’ve done a variety of composite work.
As I’ve gotten older, I don’t enjoy the mess that comes with fiberglass (the sanding dust and the chemicals) — even though I do, of course, wear proper protective gear. I am actually trying to get away from fiberglassing in my work as a shipwright, but I don’t mind doing it for my own backyard boat project. All of the significant fiberglass work I’ve done on Duracell thus far has been in our garage and in the little clearing in the woods next to the boat.
Many people assume that fiberglassing can only happen in a professional shop. I’m here to tell you that, if you are so inclined, you can do it in your backyard. My professional background with this skill set gives me some foundational understanding, but these processes are more accessible to amateurs than lots of boatfolk expect. However, undertaking this kind of work at home has taught me a lot.
I’d like to share some lessons learned from the last year of backyard fiberglassing. I hope that my learning will help or encourage anyone embarking on their own backyard fiberglassing projects.
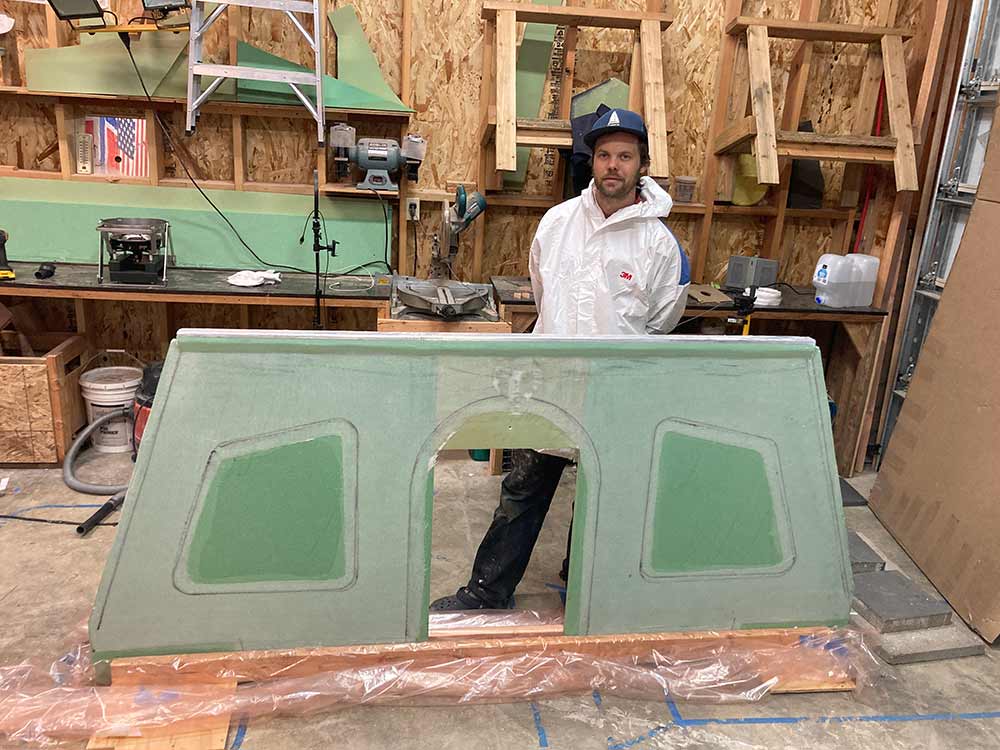
The first thing that is important to explain is that I am building the majority of the parts in panels, which are then “taped” together using fiberglass tape. This is in contrast to production yachts that are built in molds. The mold can then be re-used to build more boats. Since Duracell is a one-off project, I don’t want or need to spend time building molds. The one exception is the hull extension: I did make a mold for that. For my project, building in panels is the fastest and easiest method to create fiberglass structures, with simplicity both drawing out the parts and fairing them.
Project Materials:
- 2:1 epoxy resin
- 5-pound pvc foam for the core
- Bi-axial fiberglass for the panels
Lesson #1:
Pay attention to temperature
The ambient temperature, the temperature of the epoxy, and even the temperature of the substrate that you’re laminating — in my case, foam — are critical to successful composite work. It’s important to be really familiar with your epoxy, or other resin systems. You need to understand your epoxy’s characteristics at different temperatures, and what you can and can’t do at different temperatures. For example, if it’s too cold, some epoxies might be too thick to use or they won’t cure properly.
One of my most difficult and expensive lessons from this past year involved not understanding the characteristics of my epoxy system in relation to temperature. Up until the pilothouse roof, I did all my laminations of the pilothouse pieces (the sides and two bulkheads) in my unheated garage shop. Since it was winter, the temperature was between 35 and 40 degrees. I have a warming pad for my epoxy: warming the epoxy makes it thinner so it’s easier to absorb into the fiberglass and it also gets the chemical reaction going once you mix it. When I put the epoxy onto a cold substrate (the foam) the cold temperature of the substrate kept it from curing too quickly. As fiberglass projects go, this wasn’t ideal — ideal is having a temperature-controlled shop where everything is at 65 degrees and you can accurately predict the characteristics of the epoxy. But my backyard system of heating the epoxy and adding it to the cold substrate did work fine.
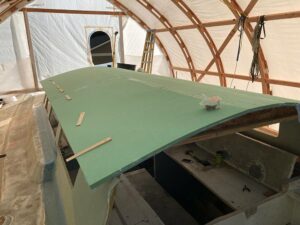
Where it did NOT work was when I was laminating one side of a very large piece (8 feet by 15 feet) of foam for the new pilothouse roof. It was laid out on the garage floor. Instead of my usual practice of laminating everything in a colder environment, for the pilothouse roof I decided to heat the garage. There was a January cold snap going through and, since I knew it would be a long project, I wanted to be physically comfortable. As I began the lamination, I was blissfully ignorant of how this temperature difference would affect the lamination.
I had everything prepared, all the fiberglass was cut, all the finishing materials were cut and laid out, my vacuum was ready and I had three heaters going in my uninsulated garage. The garage got warmer than I thought it would. I was applying two layers of heavy fiberglass and mixing warm resin two quarts at a time. I wet out the foam so it was saturated, I laid out fiberglass dry onto the foam, then I poured resin on and swept it onto the fiberglass.
That’s where things went wrong — the epoxy started curing as I was rolling out the air bubbles. Essentially, the epoxy-
saturated fiberglass did not adhere to the foam because it was setting up before I could roll out the air bubbles. I ended up with a large fiberglass panel with voids everywhere, big and small…everywhere. It was not a quality job or structurally sound.
To make a long (and painful) story shorter, I did many things wrong. Compounding the temperature mistake, I also made the mistake of doing this large fiberglassing project alone. Which brings me to lesson #2.
Lesson #2:
Get help from friends, especially for bigger projects
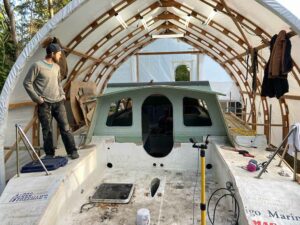
After the first pilothouse roof debacle, I cut my losses and began again — a total re-do. I did two major things differently for my second attempt. I used a slower curing epoxy, and I got help from my friend Scott. Getting Scott’s help was crucial. The slower curing epoxy and having a friend there to mix the epoxy gave me enough time to wet out the fiberglass and roll out the air bubbles.
In a professional shop, in addition to a controlled environment, you might have a team available to assist you. In your garage or backyard, that team comes in the form of friends. This time, with these adjustments, the pilothouse roof was a success. (You can view the pilothouse roof disaster and eventual success in episodes 19 and 20 on The Duracell Project YouTube Channel).
Lesson #3:
Be overprepared
Logistically, the bigger the lamination project, the more complicated they become. Visualizing the process before you begin — so you can prepare for every step — helps make the project go more smoothly, especially with the time-sensitive nature of some parts of the process. Doing this work at home provides an occasion to think through those steps, because you might be setting up the workspace for composite work for the first time. It is critical to have all the essential materials close at hand, laid out and ready to use.
One worthy bit of preparation involves marking your fiberglass pieces with a number so you know which layer goes on when. Tick marks showing exact positions that they go in work similarly.
Try to plan for all the tiny details. Think about how sticky your hands are going to be when it comes time to get peel ply onto your fiberglass. If you wear two or three pairs of gloves at a time, you can peel off gloves at moments when you need non-sticky hands.
Figuring things out when you have a pot full of resin and sticky hands is not good. The more you think through all the steps ahead of time, the better it will go.
Learn from your mistakes
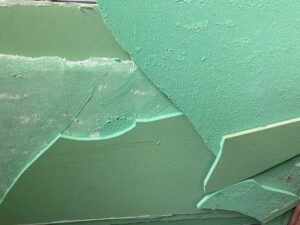
When it comes to backyard lamination, as with all boat projects, the most important thing is to begin with a willingness to make mistakes and learn. You’re going to do both. I certainly have. As Thomas Edison famously said “I have not failed. I’ve just found 10,000 ways that won’t work.” I hope that my backyard fiberglassing experiences can help you avoid some of those common errors. Now head out and build something!
After two years cruising the Pacific, Matt and Janneke are home in the Pacific Northwest. To find out more about the Duracell Project, follow their new YouTube channel where they are documenting the rebuild:
www.youtube.com/c/theduracellproject
