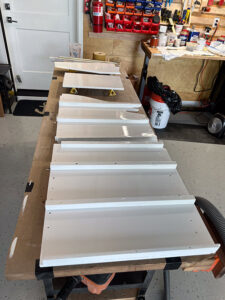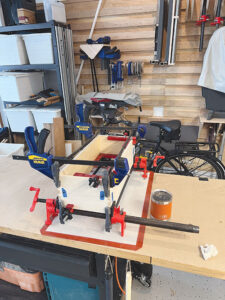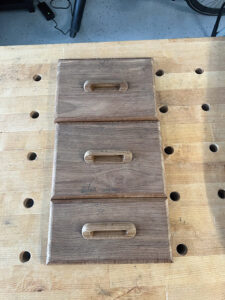
The first coats of varnish on the teak drawer fronts are drying downstairs. It has been a long and challenging journey just to get to this point. But the time and effort have proved rewarding in many unexpected ways.
This particular boat project was conceived more than a decade ago when we first started cruising on our 1984 Passport 40 sailboat, Rounder. It was early days and the full extent of the many refit projects that would eventually come to pass hadn’t even dawned on us.
But one thing was clear—we needed some more drawers.
Our boat was built in Taiwan, during a time when quality teak was generally available. To say the interior of our boat is rich in this wonderfully expressive and warm tropical wood is an understatement. Doors are made from solid teak. Same with our dining and navigator’s tables. The bulkheads and cabin soles are covered in ¼-inch thick “veneers” of teak.
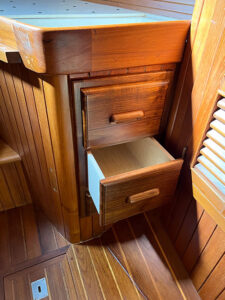
Not only did the builder use wonderful wood, but the quality of the joinery is amazing. We often marvel at the beautifully curved tops of the cabinet doors and the profile of the large galley fiddles. The drawers are built with both full- and half-blind dovetails and constructed in a fashion that allows the relatively thin bottom of the drawer to be replaced if it ever breaks.
There is a level of craftsmanship throughout the boat that is simply stunning. No one builds boats like this anymore.
But times change and our boat isn’t a museum piece, so we aren’t afraid to drill holes or install new equipment when it makes sense to do so. I just prefer to do those things in places that aren’t easily visible.

Any visible modification to our interior has to be done thoughtfully and with great care. Most of the modification that we have done inside the boat has been to areas where previous owners had already made changes, such as the ill-conceived placement of an early chartplotter at the nav station.
We already have a number of very lovely and functional drawers on the boat—in the galley, nav station and the aft cabin. Where we didn’t have any, however, was in the main stateroom, where we keep most of our everyday clothes and sundry items.
I know that drawers are considered an inefficient means of storage on a boat; lockers and shelves are much better for volume. But drawers are incredibly convenient for certain items. And when it comes to T-shirts, socks and other daily clothing, they make a lot of sense.
So each year, as I assembled the list of projects to get done on the boat, I added “build a set of drawers in the stateroom.” And each year, I never got around to building them.
This is not to say that I didn’t think about them. In odd moments, I would look around the cabin—which consists of a large V-berth, a decent-sized hanging locker, and a small square of sole—and try to figure out where drawers might go. There weren’t really a lot of good options. In fact, there was only one—the small bulkhead under the starboard side of the V-berth.
The bulkhead formed a useful, but not convenient, storage locker under a part of the berth. One day last summer, I got out the tape measure and a sketchbook and decided it was finally time to see if the dreams of drawers had a chance to become a reality.
I must have come up with a half-dozen different design sketches—and a good thing, too, since each one helped me find a fatal flaw in my thinking. Hey, I can fit four drawers about 12 inches wide right here. Oh, wait, the shape of the hull cuts right into where the bottom drawer would be. And dammit, there is a structural cleat along one side of the bulkhead that I shouldn’t cut into.

On and on it went. Finally, I had a good three-drawer design, each about 10 inches wide and between 17 and 20 inches long. They would be just large enough to be useful. But it would require some creative woodworking to build the bottom drawer, since a standard rectangular box shape wouldn’t fit along the hull.
With the approach and design now mostly worked out, I needed to confront another challenge. How in the world am I going to actually build these?
I’d only recently begun to explore woodworking as a hobby. I had taken shop classes in high school and played around with rough construction through the years. More recently, I began building out a collection of decent woodworking tools and learning new techniques, mostly for projects around the house.
But fine joinery would be a stretch. And that is exactly what I would need to do in this case.
I read Don Casey’s “This Old Boat” and Fred P. Bingham’s “Practical Yacht Joinery,” among other works. And I scoured the internet. But there was no easy step-by-step guide to retrofitting a set of drawers into the boat. So I closely examined how the other drawers were built on our boat.
I discovered a number of clever ways that the original builders used to make functioning drawers that stayed in place without any additional hardware. The details turned the simple drawer into a work of art to me.
I have heard stories about the boatyard where our boat was built, how entire families would work together on certain portions of the boat. So much of it was hand-built in conditions that would be considered primitive compared with the kinds of facilities where boats are typically constructed today. But the quality of the work didn’t suffer. In fact, it is demonstrably better than anything you would find in a new boat today.
Eventually, I felt like I was ready to dive into the project, at least half-confident that I would be able to puzzle my way through each step. And the first step was literally the one that seemed the hardest—I had to cut out the face of this perfectly nice teak bulkhead.

I built a jig so I could use my plunge-cutter for the task and … it worked! The cutout was square, in the right place and to the right dimensions.
Next, I built the teak frame for the drawers, milling the wood from rough lumber and seeking to mirror the same approach that the original builders used in the boat. That seemingly simple step took me several weeks of evenings to complete and install. But in the end, it looked perfect.
Then I had to template out and build the framework that would support the drawers inside the storage locker. It was critical to make the walls of the framework parallel to each other, and perpendicular to the frame. This too took several more weeks of puzzling and futzing to get just right.
Finally, I started on the drawer boxes and faces themselves. Because I was determined to build these to the same standards as the boat’s original drawers, I needed to learn how to cut dovetail joints and other semi-advanced woodworking techniques. More teak was milled from lumber and turned into exact matches of the other drawer fronts onboard.
I dry-fitted everything, and to my amazement, it worked.
Now there is just the final gluing and finish work left to do. That first coat of varnish is just about dry now, but I’m guessing it will be another week or two before this project is finally finished.
Although I set out to build a simple set of drawers, like many other projects, this one has opened new doors to my enjoyment and understanding of the boat on which we sail. I have gained a number of new skills, learned another important lesson in patience and focus. But most importantly, I have deepened my respect for the craftspeople who, 40 years ago, built this boat with such skill and craftsmanship.
Marty McOmber is a Pacific Northwest sailor, writer, and strategic communications professional. He is currently working on refitting and improving his 1984 Passport 40, Rounder, for continued cruising adventures near and far.


