Facing water intrusion, a cruising couple endeavors to refresh and reseal the teak decks of their trawler.
“Leaky tiki” is a nickname for otherwise awesome trawlers with water intrusion issues. Our beloved 37-foot 1977 Puget Trawler, Serendipity, is no exception. She came to us as a gift (see “Unbelievable Serendipity” 48° North’s August 2020 issue), however there is no such thing as a free boat—you can still count on investing in sweat equity and in cold, hard cash. Serendipity’s generous prior owner, Tom, kept her motor purring, but her teak decks proved too great a challenge to tackle. When it rained hard enough outside our boat, it rained inside, too.
We rate cruising in the beautiful Pacific Northwest as among the best in the world—an opinion we maintain after sailing halfway around the world and visiting thirty-one countries in a previous boat. One reason the Northwest is so beautiful is that it rains, but this, of course, creates its own challenges. It rains in the fall. It rains in winter. It rains in spring. It rains less in summer, but it still rains. You can enjoy boating throughout the year, yet precipitation is unavoidable. We needed a solution for our leaky tiki.

For the rainiest season, Tom and his wife Diane (not their actual names, which they prefer to keep private) sidestepped the issue by keeping Serendipity under covered moorage when not cruising. We followed suit, but wanted to be more ready for off-the-dock adventures, so we had a project ahead of us.
Misery Above the Waterline
Long before Serendipity became ours, water rippled the finish paneling of the wardrobe wall adjacent the bed. Water soaked Serendipity’s bed for us, too. Wayne traced the source first to a low spot on our cabin deck where water worked its way in around the aft hatch area, then to a window with aged caulking. He resealed the window.
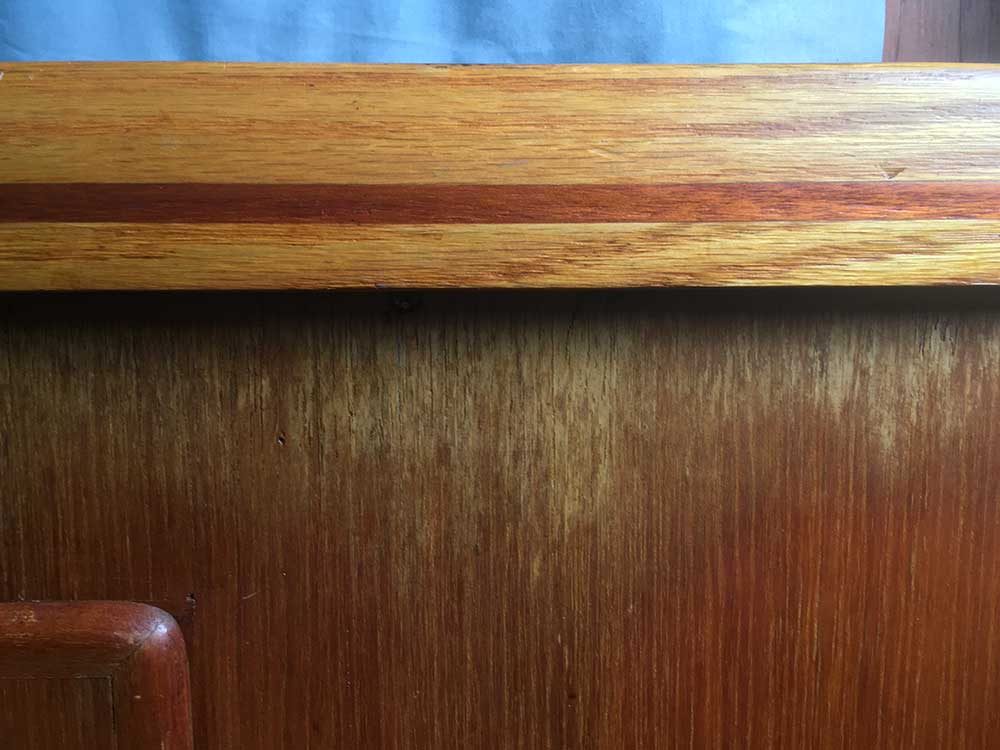
Family matters prompted us to temporarily leave Serendipity in 2018, and she spent those months away from covered moorage. We arranged for caretakers to look after her, but they unexpectedly had to leave the country. Unattended, leaves clogged her drains. We returned to Serendipity to find standing water pooled on her deck. The water worked its way through some tired window caulking on her other side. Wayne re-caulked that window, but the incursion had already made its mark, water-staining our stateroom cabinetry.
Thanks to good housekeeping and even better luck, we were not plagued by mold or mildew, soft spots, fiberglass delamination, or other more serious water damage issues.
I still gave Serendipity’s interior wood and fiberglass surfaces a good clove oil and water misting and cloth wipe-down. Clove oil is a good mold remover and inhibitor.
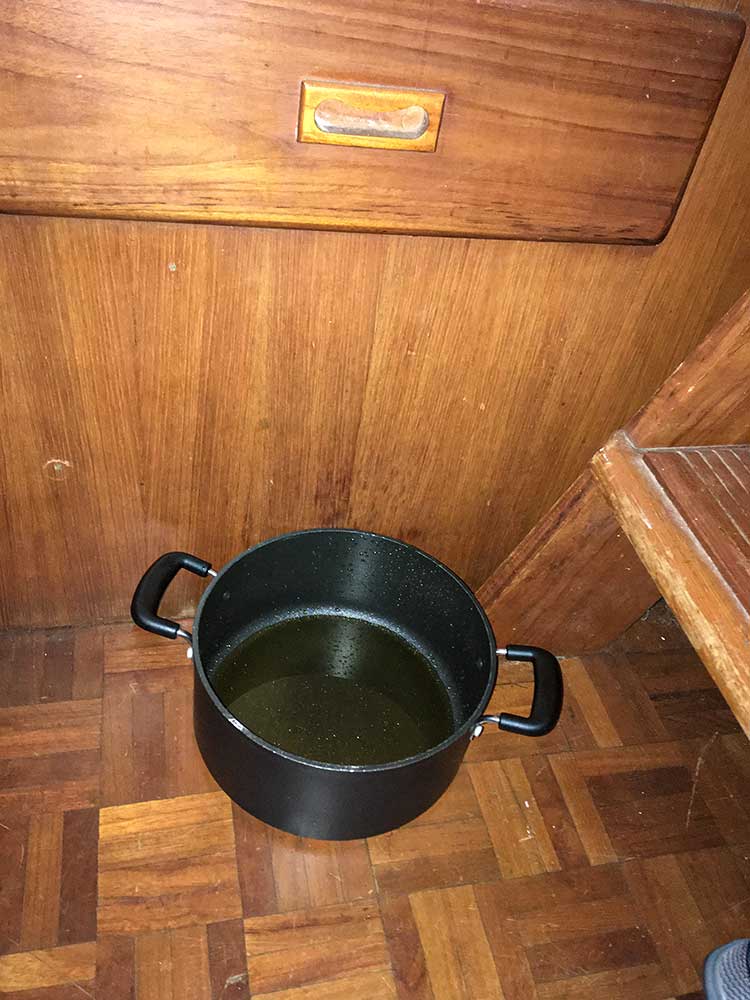
During long downpours, water still ran down and dripped around our propane heater pipe, puddling onto our salon floor. We placed a pot, surrounded by towels, to catch the rain below the heater.
We’re sun lovers. As we hunkered in our humid boat, the dampness ate at our souls. We were miserable.
Finding the source of leaks is tough. Where the water enters the boat is not usually where the leak shows up inside the boat. It’s like playing whack-a-mole—as soon as you’re sure you’ve nailed the problem it pops up elsewhere.
Tom figured the trawler’s teak decks were the likely culprit. The 40-plus-year-old sealant between each deck plank oxidized and cracked; the sealant needed stripping and replacement. “I tried to rework a small section—way too much work,” Tom told us. “Do what most folks do,” he advised, “tear out the teak decks and re-fiberglass it.”
Fiberglass Versus Teak Repair
Wayne, my husband, had never refurbished a teak deck before. However, he’s no stranger to boat work. Asking around, he quickly concluded if he paid anyone to fiberglass or redo the teak decks, the cost would likely approach the total value of the boat, then around $20,000. That kind of investment made little sense to us.
I work at West Marine, and one of my colleagues faced a similar decision with his sailboat. He estimated the cost of materials and calculated either way, materials would run about $2,500. He believed the labor was equivalent on either project. The difference is the way each project needed to be done.
After removing the decks, fiberglass work must be completed in a compressed, intense work period. My colleague and his wife completed their sailboat fiberglass project in a little over two weeks straight of intense, long workdays. Repairing rather than removing a teak deck, however, can be done as a series of smaller projects over a longer period of time.
Given a choice between an enormous project that requires near non-stop work, versus the ability to stretch the work out over time, Wayne’s preference is the latter. Besides, Wayne hates fiberglass work, particularly grinding fiberglass.
Most leaky tiki boat owners do what my West Marine colleague did—rip out their teak decks and fiberglass over the top. From a resale perspective, fiberglass typically is the preferred approach; it eases future buyer’s leak concerns.
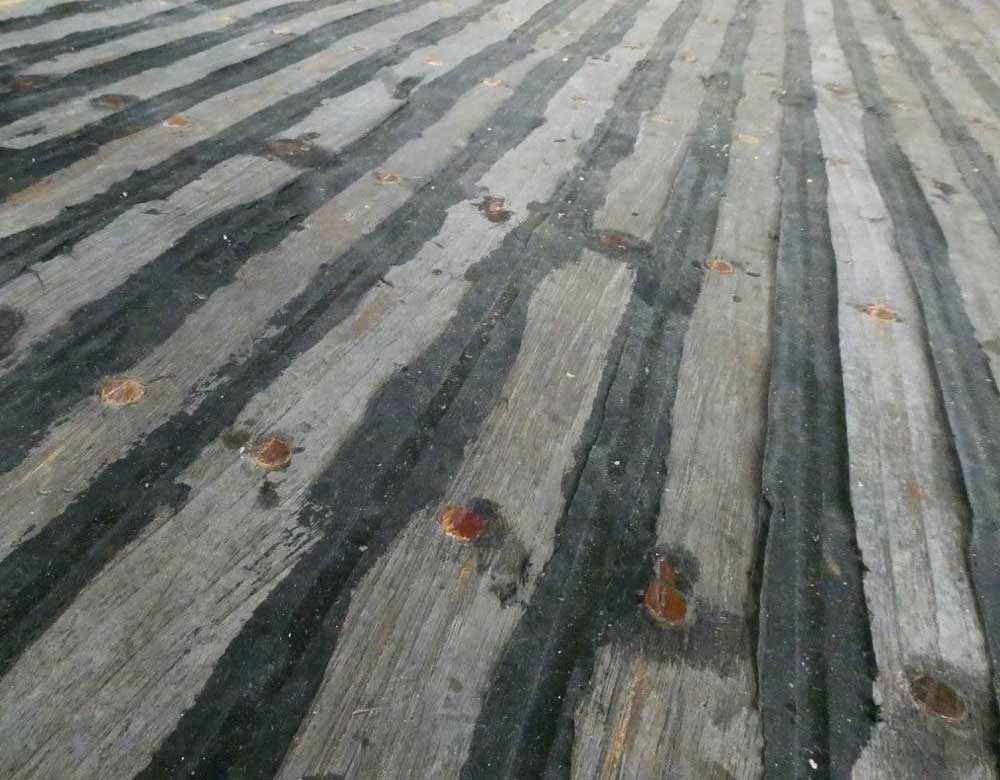
However, outside the caulk leaks and the need for a good maintenance sanding, our teak was in reasonable shape. The wood was rough on the surface, but it appeared to be simply surface weathering—the wood itself wasn’t porous or cracked. Back in the 1970s, the teak deck planks used on trawlers like ours was 1/2-inch thick; that kind of wood is no longer readily available. Wayne’s a bit of a romantic when it comes to bygone materials; it seemed a crime to just toss all that potentially beautiful teak.
Before finalizing his decision, Wayne reconnected with Tom and engaged on Trawler Forum’s community discussion.
Getting to the Core of the Problem
Through Trawler Forum, Wayne discovered the source of the problems traced back to how manufacturers constructed the decks.
The builders glued the deck down over the fiberglass. However, to position the decks securely in place while the adhesive was drying, the manufacturers screwed them down. The screws weren’t needed long term; once dry, the adhesive was more than sufficient to secure the decks to the fiberglass. Then wooden plugs were placed over the tops of the screws. Because the manufacturers rarely did anything to make sure the screw hole remained watertight, over time, the screws underneath the plugs leaked.
From there, Wayne watched how-to videos on YouTube and consulted with caulking manufacturers’ resources. All of this led him to the following:
12-Step Deck Repair Process
Wayne followed this 12-step process to save the original teak decks and stop our leaks.
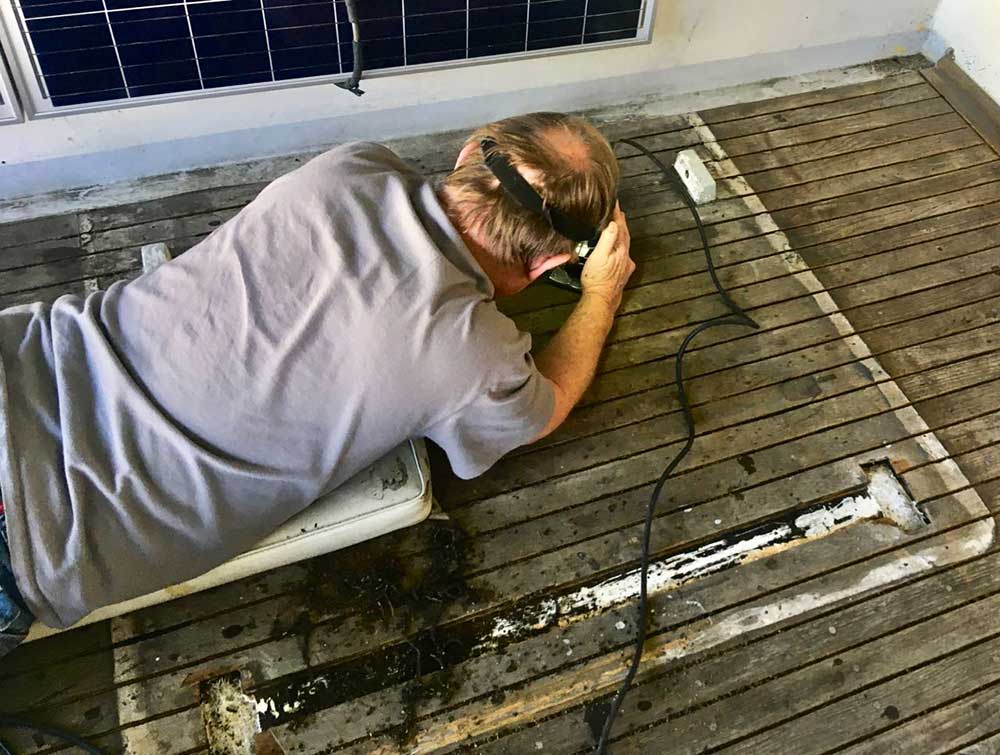
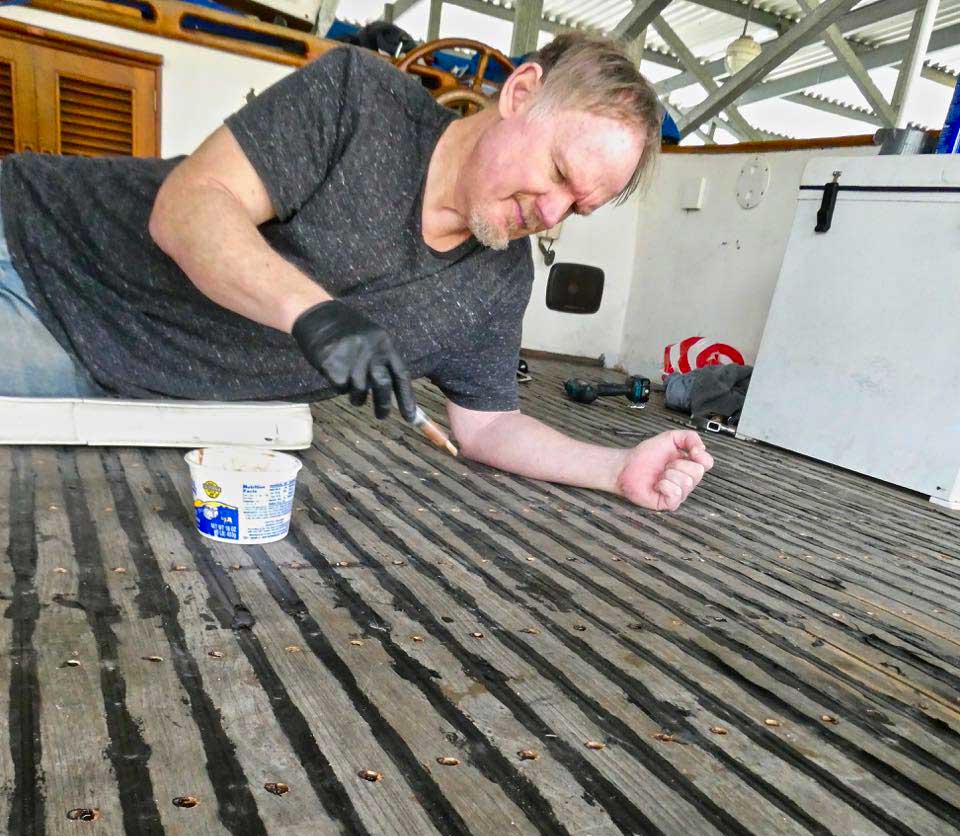
- Remove the original sealant between each teak deck plank. Originally, Wayne did this by hand, using a reefing hook. Later, a friend loaned him a trim router—a huge time-saver.
- Remove every original screw which bolted the deck to the floor.
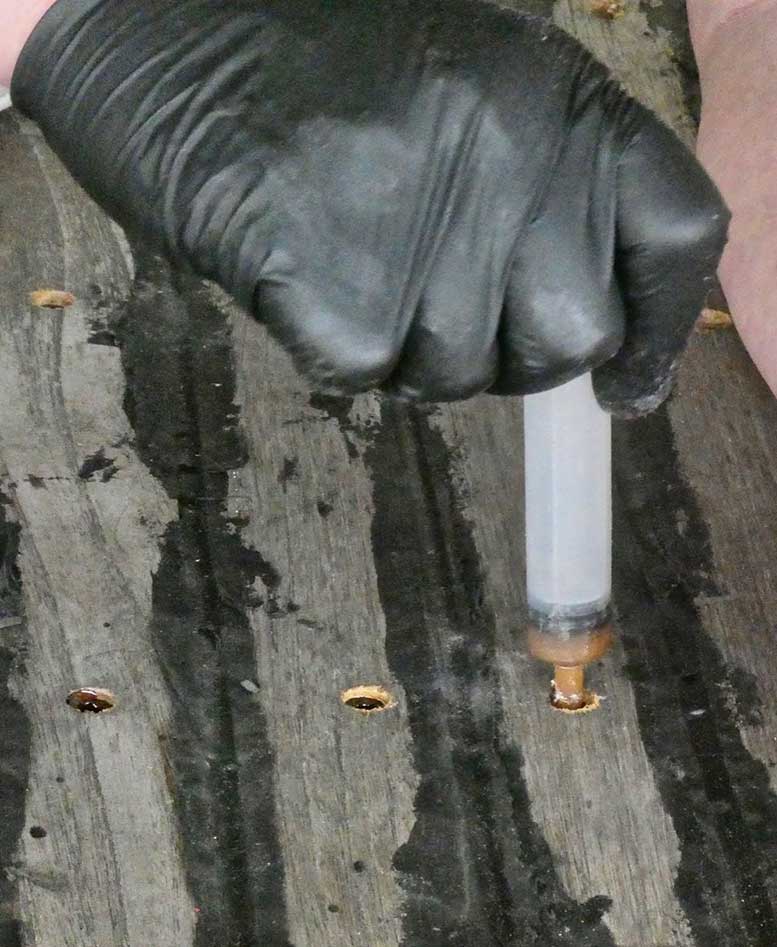
- Drill out each screw hole and fill with thickened epoxy. The epoxy replaces the unnecessary screw with an impervious seal.
- Put a new wooden plug over each original decking screw hole and fill any openings with waterproof wood glue.
- Shave the new plugs to level with the teak deck surface.
- Clean every newly routed channel with mineral spirits to get the teak oil off.
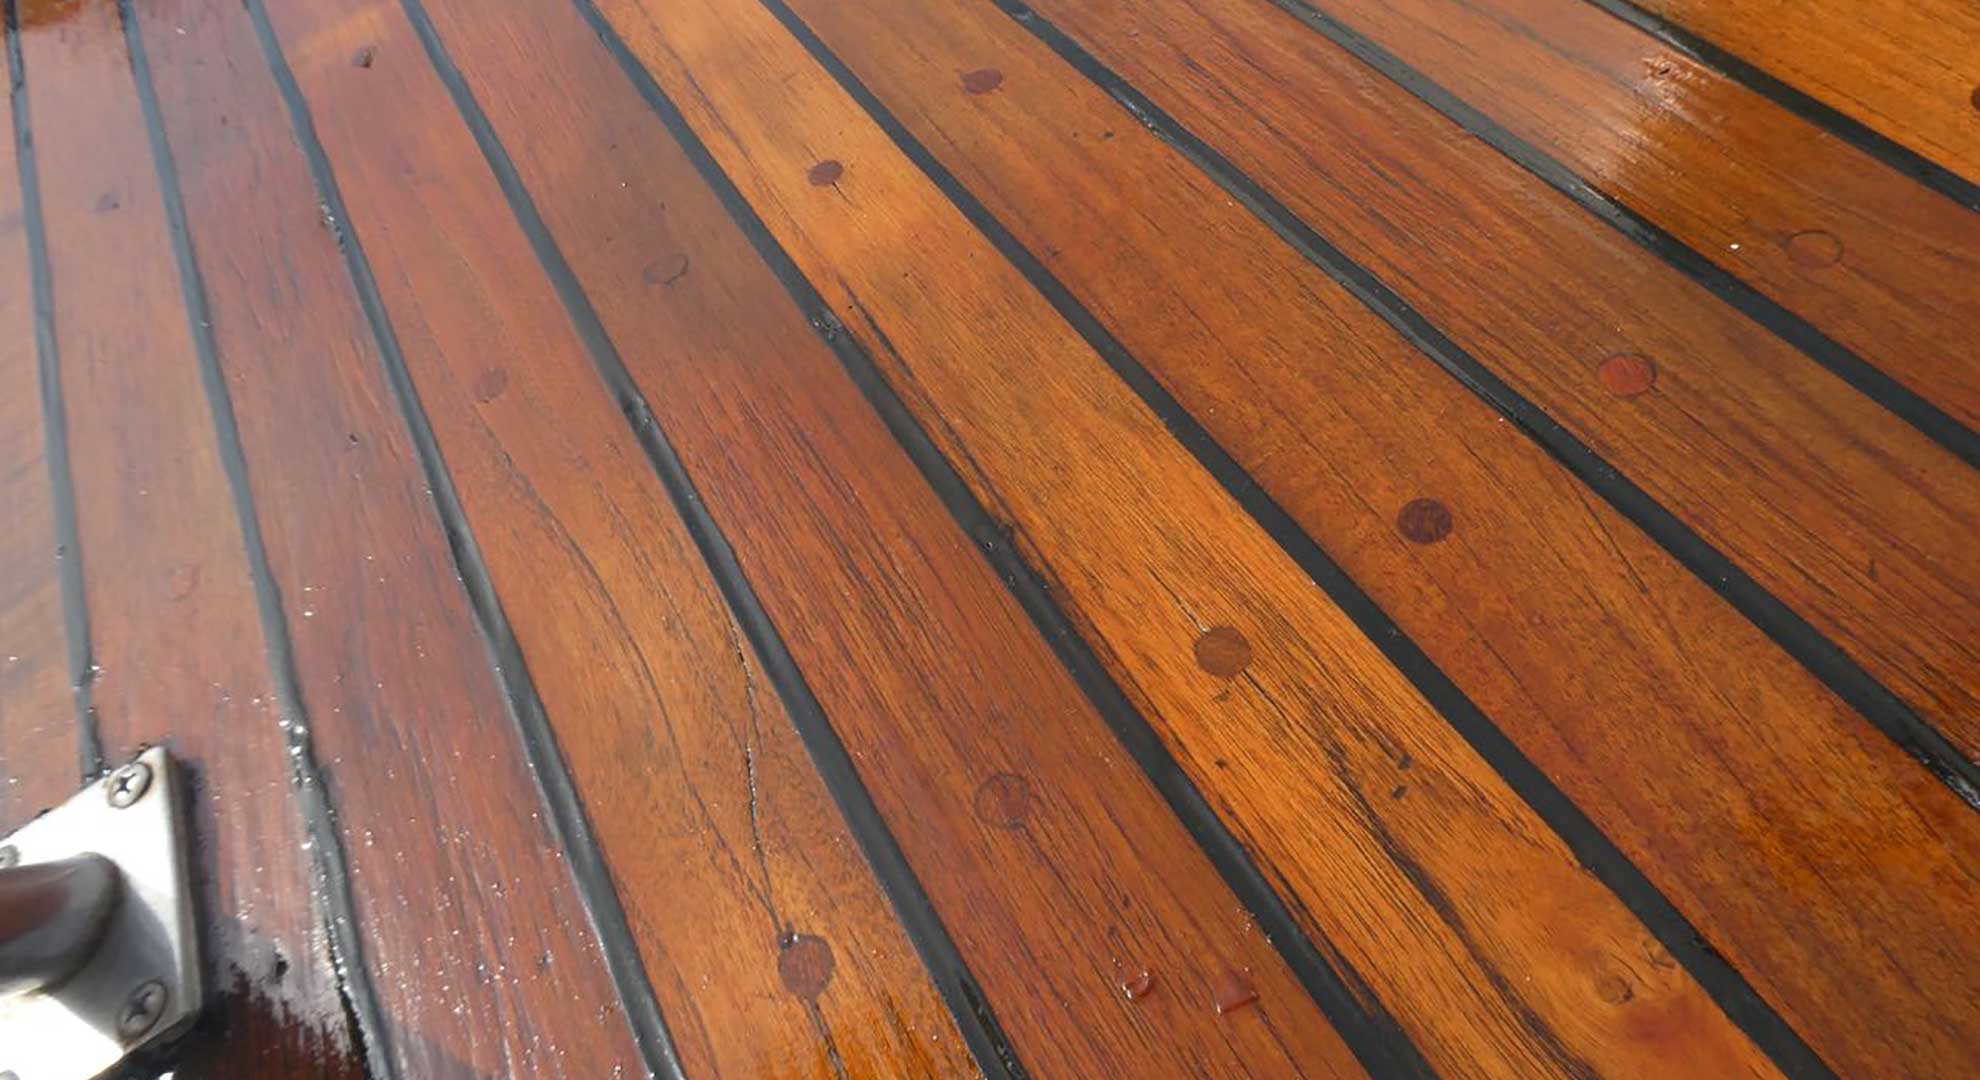
- Re-caulk the seams (Wayne used Teakdecking Systems SIS 440 decking caulk). Let sealant dry and remove the tape if used.
- Clean and level the entire deck surface by sanding it,
- Vacuum up the mess.
- Retape and retouch any caulking areas that need it.
- Final sand the completed surface.
- Cetol (our varnish of choice) five coats over the entire surface.
Wayne also pulled out our propane heater exhaust pipe, cleaned it up, and slid it back into place. He then thoroughly sealed all around the exhaust pipe until it was watertight. Technically, this is not a decking issue, but one more area where leaks could occur.
How Long Did the Project Take?
When I’m asked, “How long does it take to sail from the U.S. to Australia?” I reply, “The question should be, how long did you choose to take?” We chose to take three years sailing there—and wish we had taken four or five. Restoring teak decks is similar: you can choose how long you want the project to take. How long do you want to work in a day? How often do you want to work on the project? When do you want to be done?
Wayne began tackling our water leak issues when we first got Serendipity, the summer of 2017. He wanted the temperatures warm and the decks dry while doing the work, so chipped away at the work primarily in summer. He finished the work over three summers.
It’s difficult for Wayne to estimate how many hours he put in—“thousands,” he claims with a smile. I believe it’s well less than “thousands,” though definitely many times over my West Marine colleague’s two intensive weeks of fiberglass work. Doing teak decks is somewhere between a labor of love and water torture.
What Did the Teak Refinishing Cost?
Though over the three years, we didn’t tightly track all the project expenses, Wayne estimates we spent about $1,800 in materials. We kept our cost that low by taking full advantage of my West Marine employee discount, price matching and assertive bargain shopping online.
Caulk was by far the biggest materials expense. The 10.3-ounce tubes retail for as much as $30 for a tube.; Wayne believes he used about sixty tubes—over $1000. Cetol was our next biggest expense; quarts retails for $55. Wayne spent an additional $180 on plugs, and the rest in miscellaneous expenses: glue, sandpaper, and tools (including a reefing hook).
Costs will vary depending on the size of the boat, the method chosen, etc.
Wayne doesn’t know how to calculate the cost of achy knees, by far the worst part of the job.
What We Learned
When I asked this question, Wayne responded in maniacal laughter. More humbly, he added “It’s a big learning curve.”
His advice:
- Do online research, including watching lots of how-to YouTube videos.
- Use a trim router rather than a reefing hook. He didn’t use one until his last deck; even though it was by far the most damaged, he completed it in far less time. Everything else he would do exactly the way he did. Hand-reefing out the caulk was the hardest, most labor-intensive part of the process.
- No matter how much you read, talk to others or watch how-to videos, you will learn by doing the work.
Was the Teak Deck Repair Worth It?
Yes! We no longer cower in fear when clouds roll onto the horizon or we hear those first plop-plops of rain. We celebrated the end of the bed area leaks with a new custom mattress. Serendipity gets tons of compliments, a nice icing on the cake for Wayne’s well-earned sense of accomplishment.