From the April 2021 issue of 48° North.
One of the fortunate parts of being a boater in the Pacific Northwest is that the waters of the Salish Sea are open for year-round racing and cruising adventures. That said, most mariners use their boats far more frequently in the latter months of spring, throughout the summer, and into the early months of fall. Come late fall, most vessels get put into hibernation-mode for the winter and need to be awoken when the sun starts to shine a bit brighter and high season beckons.
Now that spring is officially here and summer is on the horizon, it’s time to rouse your boat from its long winter nap. To help with this often overlooked and seemingly daunting mission, 48° North checked in with local experts who offered advice and recommendations to prepare your beloved watercraft and crew for the season ahead. Keep in mind, this is by no means a comprehensive checklist, but it will set you well on your way to water-borne glory in the months to come.
SAFETY FIRST
by Margaret Pommert
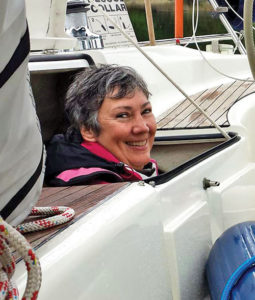 When I think about getting a boat ready for a day sail, a season of cruising, a regatta, or a voyage down the coast, I always start in the safety department. I explore specific questions like: What safety equipment does my boat have and what is missing? How does it need to be maintained? And what training or skills does my crew need in order to use it properly? For this, professional captain, sailing instructor, and board member of The Sailing Foundation, Margaret Pommert, offered up some guidance on assessing and preparing your boat’s safety gear before the season starts. – Andy
Create a locator diagram: Safety equipment is of no use if your crew can’t find it when they need it…even if you aren’t there. As you review and recommission your safety gear this spring, sketch out a simple locator diagram showing where safety equipment is kept on board and then post it for crew to review.
Your diagram should clearly label the location of fire extinguishers, throwable overboard equipment, emergency tiller, first aid kit, EPIRB, abandon ship bag, signaling devices such as horns and flares, seacocks, damage control kit and thru-hull plugs, flashlights, handheld VHF radio, and anything else you deem necessary.
Crew overboard: Check that the bitter end of your LifeSling is secured to the boat and the white UV cover is over any part of the floating line exposed to sunlight. If you do find that any exposed part of the floating polypropylene line has been exposed to the sun for an extended period, inspect it for damage. Bend it into a tight bend. If individual strands are brittle, it’s time to replace that part of the line.
Check the batteries on water activated lights attached to overboard gear. If you have an inflatable Man Overboard Module (MOM), spring is a good time to inspect its condition and/or have it professionally serviced. Check that your hoisting system for getting a person out of the water works and is easily accessible. This might be a bag with a block and tackle kept in a cockpit locker or one that is part of your boat’s rigging. Then, go out and practice a few overboard recovery drills with your crew on a nice spring day.
Fire: Fire on a boat is one of the ultimate nightmares (along with sinking) for all sailors. Check that your boat’s fire extinguishers are fully charged and still within their inspection period. If they’re not, have them serviced as soon as possible. Give dry powder extinguishers a shake to prevent caking. Check for safe escape routes from a fire in each cabin on board. Do you have a dinghy secured on deck that prevents fire escape from a forward hatch? Test fire and carbon monoxide alarms. Inspect your boat’s propane system from the tanks to the stove and oven to ensure all connections are secure and leak free. And make sure you have a fire blanket easily accessible in the galley.
Personal safety equipment: Personal safety equipment can be difficult for a skipper to check on an annual basis because it’s … personal. If you have crew members that join you intermittently, such as for races, it can be a good idea to have a personal safety equipment checklist that you go through with each of them before you depart. This could include ensuring they have with them the basic equipment appropriate to the voyage, such as PFD, harness, tether, waterproof headlamp, personal EPIRB and/or personal overboard beacon. Clarify what equipment is available on your boat, such as jacklines, and what you are expecting individual crew members to bring.
Check that inflatable PFDs have a CO2 cartridge installed and armed. Inflate them with the oral tube and leave them sitting overnight to be sure that they hold air. Check conventional foam life jackets for damaged clips, straps, or fabric.
Radar reflector: Some boats have a permanently mounted radar reflector, some have reflectors that are just hoisted when needed. If yours is the type that you just hoist when you need to, ensure you know how to assemble it and have a good system for hoisting it high into the rigging. Whether yours is permanent or temporary, part of your spring checklist can be to hail a nearby boat and ask them how well they see you on their radar.
Take a Safety Course: My tips above are not intended to address all the safety equipment you should have onboard or inspect. To help with overall preparedness, I highly recommend taking a US Sailing sanctioned Safety at Sea course, online and/or hands on.
THE BIG PICTURE
by Amanda Swan Neal
 Once your boat’s safety gear is sorted out, it’s time to take a full scale look at the broader picture. For this, I pinged an all around sailing expert with hundreds of thousands of miles under her keel and many boat re-commissionings to her credit, Amanda Swan Neal.
Get Organized: When commissioning your boat for the season ahead, you’re going to have lots of lists. Don’t be too keen to get your checklists done in one shot. Instead, I suggest allocating the tasks into manageable sections depending on time, how much help you’ll have or need, and weather.
Start from the keel up: First, assess the condition of your antifouling, as you may need to apply new paint. Replace sacrificial zinc anodes on the prop, shaft, hull, and bow thruster if they are eroded more than 40 percent. Ensure the prop is clean, and greased if required. Of course, this is easy if your boat is out of the water. If it’s in the water, hire a diver to give you a full evaluation and help with prop maintenance and zincs.
Take care of the iron genny: Along with the sails, the engine is the heart of the boat, so it deserves special attention. Inspect the state of your batteries, their cables, and connections. Shine a light on the engine mounts looking for cracked, deteriorated rubber or corroded fasteners. Install a new raw water pump impeller, and/or keep a spare aboard. Check the tension of all belts, particularly the alternator belt, since any slippage may cause overheating and burnout. Inspect hose clamps and hoses for signs of weeping and damage. Squeeze them, if they hold their shape they’re generally fine.
Check the oil and coolant level and ensure there is no sign of water or debris in the fuel-water separator settling bowl. Change those fluids if necessary. Run the engine and monitor your charging systems, fuel filter, coolant level, and exhaust. It’s a good idea to hire a mechanic for the more in-depth considerations, which might include: valve adjustment, fuel injector servicing based on exhaust smoke, tightening the head bolts if required, aligning the engine, and checking turbo boost pressure, if applicable.
Systems are next: Inspect the rudder and rudder bearing as well as the steering system. Fill the bilge with water and test the bilge pump and float switch. Open and close the handle of each thru-hull making sure they swing freely and inspect all connecting pipes and hose clamps. Service as needed.
Fill and flush the water tanks. Test the stove and propane alarm, and run the heating system for at least 10 minutes. Ensure all the lights and outlets are working. Run the navigation systems and communication devices, and monitor all of the instruments. Make sure the autopilot is functioning properly. Then move on deck and check the anchor windlass operation, and inspect the rode and chain.
Lastly, when your safety gear has been sorted (see above) and your rig has been inspected (see below), undertake a shakedown cruise to a calm anchorage, enjoy a rewarding meal, and celebrate being back on the water.
KEEP THE RIG STANDING
by Cliff Hennen
 Continuing upward, now it’s time to take care of the most important parts of a sailboat — the rig and all its components. For this, I turned to professional rigger and owner of Evergreen Rigging, Cliff Hennen, who started with this guidance for sailors:
“You don’t have to be an expert to do a simple rig inspection, just be familiar with what to look for and check for things that don’t seem right. I recommend sailboat owners have a fundamental understanding of all the elements of their spars, running rigging, and standing rigging. Do a simple inspection at least annually — and spring is a perfect time for this essential bit of preventative maintenance.”
Begin below decks: Check the base of the mast. Some water intrusion inside the mast is to be expected, but water should drain to the bilge effectively and not pool near the mast base or in the mast itself. Make sure any weep holes are not clogged with debris. Look for signs of corrosion at the mast base; significant corrosion should be checked by a professional and remedied accordingly.
If you have a deck stepped mast, make sure there is no water intrusion. In particular, check where the mast wiring penetrates the deck, as this is a common area for water to find its way in.
After inspecting the mast, check the condition of chainplates wherever they are accessible inside the cabin. Look for telltale signs of leaking, and inspect any tie rods, bolts, and fasteners that are holding everything together.
Deck level items: Take a look at all the elements of the running rigging. Are all the lines in good repair? Are any of them badly chafed? Check all the blocks to make sure they spin freely and all the rope clutches to see if they open and close smoothly. Are all shackle pins screwed in completely and moused to prevent loosening? Winches should spin freely and the pawls should have a crisp, firm clicking sound, indicating that they are operating and seating properly. If not, you may be due for a winch servicing.
Next, inspect your boat’s lifelines. If they are covered, look for places where rust is weeping through. Check all the strands to ensure none are broken or badly corroded. Make sure pelican clips open and close easily, and that toggles and turnbuckles are pinned properly.
Standing rigging: Check the state of tune — does the rigging feel tight? Use a tension gauge if you have one. Sight up the mast to make sure it is in column (straight) side to side, and tune the mast if necessary.
Pay particular attention to where the wire enters the swaged fittings, as this is a likely place for corrosion. A magnifying glass and a small piece of maroon Scotch-Brite pad are useful to clean up and take a closer look at suspect areas. Look for broken or proud strands; a strand that sits proud of the other strands is often a sign that the strand broke inside the swage. Also look for signs of excessive rust stains. If you observe areas of concern, clean it with the Scotch-Brite pad and take a look with the magnifying glass. Cracks and crevice corrosion that are of concern are often not visible without a magnifying glass.
Inspect the chainplates and the caulking around them on deck. The caulking should be pliable — if it is dried out and cracking you should rebed the chainplates to prevent water intrusion through the deck.
Nowadays, most boats have roller furling headsails, and they need to be exercised to ensure they operate freely. On a calm day, roll the sail in and out at the dock to make sure it’s running smoothly. If the furler has an open section of bearings, be sure to give it a good freshwater rinse when washing the boat. Service the furler in accordance with the manufacturer’s maintenance recommendations.
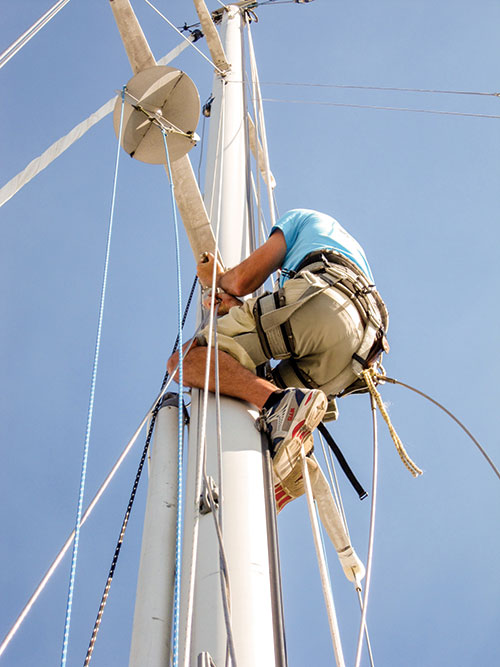
Going aloft: If you feel comfortable going aloft, I recommend inspecting the standing rigging all the way up the mast. Again, pay close attention to the terminals and where the wire enters the terminals — this is a common place for rigging failure. Take a look at the tangs, inspecting for corrosion or cracks. Inspect the spreaders for corrosion or cracks as well. Replace UV damaged spreader boots. Check that all mast lights are operational. And don’t forget to check the halyard sheaves at the masthead to make sure they are all spinning freely.
GO TIME
Going through the above list of tips and advice from Margaret, Amanda, and Cliff may seem like a formidable task, but it doesn’t have to sink your sailing ambitions. Involve family and crew members in the process and don’t be afraid to hire professionals if something seems amiss or if you’re not comfortable with a particular piece of gear or equipment.
Remember, the more preparation you do at the dock, the less you’ll have to do in a remote anchorage or marina. And though the jobs can be tedious, preventative measures ensure the safety of boat and crew and enhance enjoyment for those upcoming sunny days and sundowners in your favorite cove.